The Grand Canyon. Just the name conjures images of vast, sun-drenched landscapes, vibrant colors splashed across ancient rock formations, and a sense of awe that’s hard to put into words. But capturing that feeling in a photograph? That's a whole different ball game. (Discover expert photography tips for capturing the stunning beauty of the Grand Canyon. Learn about lighting, composition, gear, and more to take breathtaking photos!) It's more than just pointing and shooting; it's about understanding the light, the landscape, and how to translate the canyon's majesty into a two-dimensional image. Trust me, I've been there, wrestled with the shadows, and chased the perfect sunset.
Photographing the Grand Canyon requires a blend of technical skill and artistic vision. We're talking about mastering exposure in challenging lighting conditions, using composition techniques to convey the scale of the canyon, selecting the right gear for the job, and understanding how weather and time of day affect the scene. It also means preparing for the elements, knowing the best viewpoints, and being patient enough to wait for that perfect moment. And honestly, sometimes it's just about luck!
The goal here is to equip you with the knowledge and confidence to take photos of the Grand Canyon that you'll be proud of. Whether you're a seasoned pro or a casual enthusiast, these photography tips for capturing the beauty of the Grand Canyon will help you elevate your game. We'll cover everything from choosing the right lens to finding the hidden gems that most tourists miss. We'll explore the magic of sunrise and sunset, the drama of monsoon season, and the challenges of shooting in midday sun.
So, ready to dive in? Get ready to learn some valuable tips and tricks that will transform your Grand Canyon photos from snapshots into stunning works of art. Armed with the right techniques and a healthy dose of inspiration, you can create images that truly capture the essence of this incredible natural wonder. Now, let’s get to it!
Gear Up for Grandeur: Essential Equipment for Grand Canyon Photography
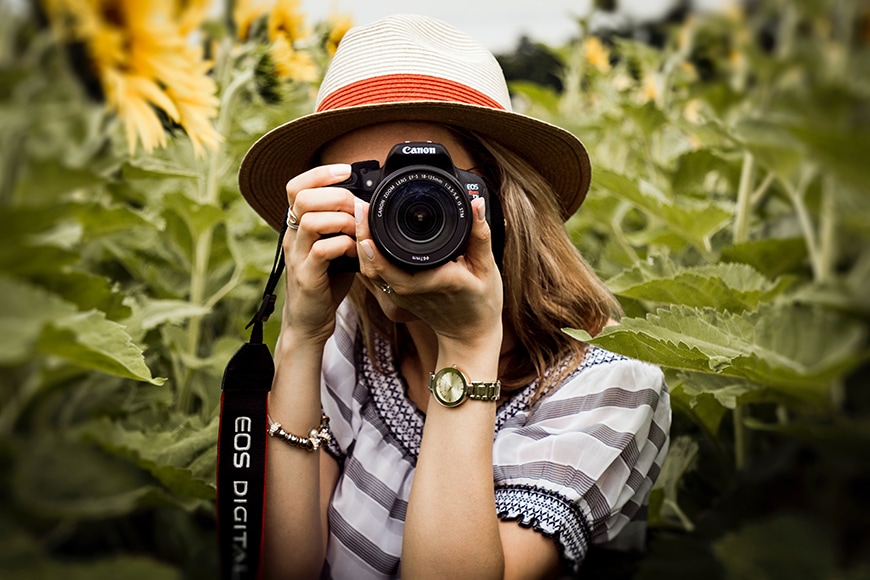
Choosing the Right Camera
Okay, let’s be real: you don’t need a fancy, expensive camera to take great photos at the Grand Canyon. But having the right equipment can definitely make a difference. Here’s the lowdown:
DSLR or Mirrorless: These offer the most flexibility and control, especially when shooting in challenging lighting conditions. The ability to change lenses is a huge plus. Point-and-Shoot: Totally fine! Many point-and-shoot cameras have excellent image quality and are super convenient. Just be aware of their limitations in low light and with zoom capabilities. Smartphone: Don’t underestimate the power of your phone! Modern smartphones have amazing cameras. Just remember to clean the lens and be mindful of your composition.
I remember one time, I saw a guy with a top-of-the-line DSLR struggling to get a decent shot, while someone else with a smartphone was snapping incredible panoramas. It’s not always about the gear; it’s about how you use it.
The Lens Lowdown
Your lens choice will dramatically impact your Grand Canyon photos. Here’s a quick guide:
Wide-Angle Lens (16-35mm): Essential for capturing the vastness of the canyon. It allows you to fit a wide perspective into the frame, emphasizing the scale and grandeur. Standard Zoom Lens (24-70mm): A versatile option for a variety of shots, from landscapes to closer details. It’s a good all-around choice if you only want to carry one lens. Telephoto Lens (70-200mm or longer): Great for isolating distant features, compressing the perspective, and capturing wildlife. It can also create some stunning abstract compositions.
I personally love using a wide-angle lens at the Grand Canyon. It lets me capture the full scope of the landscape and really immerse the viewer in the scene. But don't overlook the power of a telephoto lens for picking out those intricate details and patterns in the canyon walls.
Tripod: Your Steady Companion
A tripod is your best friend when it comes to landscape photography, especially at sunrise and sunset when the light is low.
Sharpness: A tripod ensures sharp images, especially when using slow shutter speeds. Composition: It forces you to slow down and think carefully about your composition. Low Light: Essential for capturing long exposures and night shots.
Trust me, lugging a tripod around the Grand Canyon might seem like a pain, but it's worth it. The difference in image quality is night and day. I've definitely regretted not bringing my tripod on a few occasions!
Other Essential Accessories
Don’t forget these often-overlooked items:
Extra Batteries: You'll be surprised how quickly your batteries drain, especially in cold weather. Bring at least two extra batteries. Memory Cards: Make sure you have enough storage space for all those amazing photos you're going to take. Lens Cleaning Cloth: Keep your lens clean to avoid unwanted smudges and flares. Remote Shutter Release: Helps to minimize camera shake when using a tripod and long exposures. Filters: Polarizing filters reduce glare and enhance colors, while neutral density (ND) filters allow you to use slower shutter speeds in bright light.
Chasing the Light: Mastering the Golden Hours and Beyond
The Magic of Sunrise and Sunset
The golden hours – the hour after sunrise and the hour before sunset – are prime time for photography. The light is soft, warm, and flattering, creating a magical atmosphere.
Golden Light: The low angle of the sun casts long shadows, adding depth and dimension to the landscape. Warm Colors: The warm hues of the sun enhance the colors of the canyon, making them appear richer and more vibrant. Dramatic Skies: Sunrises and sunsets often produce dramatic skies with vibrant colors and interesting cloud formations.
Getting up early for sunrise at the Grand Canyon is totally worth it. I know it’s tough, especially on vacation, but the reward is incredible. The way the light slowly creeps across the canyon walls, revealing hidden details and transforming the landscape, is simply breathtaking.
Midday Challenges and Solutions
Shooting in midday sun can be tricky. The light is harsh and unforgiving, creating strong shadows and washing out colors. But don't despair! Here are a few tips:
Look for Shade: Find shaded areas where the light is softer and more even. Use a Polarizing Filter: This can help to reduce glare and enhance colors. Shoot in RAW: This gives you more flexibility to adjust the exposure and colors in post-processing. Focus on Details: Instead of trying to capture the entire canyon, focus on smaller details like rock formations, textures, and patterns.
I remember one time, I was stuck at the Grand Canyon during midday. I was frustrated because the light was so harsh. But then I started looking for smaller details – the intricate patterns in the rock, the way the light filtered through the trees – and I ended up capturing some really interesting shots.
Embracing the Blue Hour
The blue hour – the hour before sunrise and the hour after sunset – is another great time for photography. The light is soft, cool, and ethereal, creating a dreamy atmosphere.
Cool Colors: The blue light enhances the cool tones of the landscape, creating a sense of tranquility. Long Exposures: The low light allows you to use long exposures, blurring water and creating motion effects. Star Trails: If you're lucky enough to be at the Grand Canyon on a clear night, you can capture stunning star trails.
Don't be afraid to experiment with long exposures during the blue hour. You can get some really unique and interesting results.
Composition is Key: Framing the Grand Canyon's Majesty
Rule of Thirds
The rule of thirds is a fundamental principle of composition. Imagine dividing your frame into nine equal parts with two horizontal and two vertical lines. Place key elements of your scene along these lines or at the intersections.
Balance: This creates a more balanced and visually appealing composition. Interest: It draws the viewer's eye to the important elements of the scene. Depth: It helps to create a sense of depth and perspective.
Leading Lines
Leading lines are lines that draw the viewer's eye into the scene. They can be roads, rivers, fences, or even rock formations.
Depth: They create a sense of depth and perspective. Interest: They guide the viewer's eye through the scene. Focus: They lead the viewer to the main subject of the photo.
Framing
Framing involves using elements within the scene to frame your subject. This can be trees, rocks, arches, or even shadows.
Focus: It draws attention to the main subject. Depth: It adds depth and dimension to the scene. Interest: It creates a more visually interesting composition.
Symmetry and Patterns
Look for symmetry and patterns in the landscape. These can create visually stunning and captivating images.
Balance: Symmetry creates a sense of balance and harmony. Interest: Patterns add visual interest and rhythm. Abstraction: They can create abstract and artistic compositions.
I love looking for patterns in the canyon walls. The way the layers of rock are stacked on top of each other creates some really interesting and abstract designs.
Finding the Perfect Vantage Point: Exploring the Grand Canyon's Hidden Gems
Popular Viewpoints: Beyond the Crowds
While popular viewpoints like Mather Point and Yavapai Point offer stunning vistas, they can also be crowded. Try exploring some of the less-visited viewpoints for a more intimate and unique perspective.
Desert View Watchtower: Offers panoramic views of the canyon and the Colorado River. Lipan Point: Known for its stunning sunsets. Yaki Point: A great spot for sunrise and sunset, but requires taking the shuttle.
Hiking for Unique Perspectives
If you're up for a challenge, consider hiking down into the canyon for some truly unique perspectives.
Bright Angel Trail: A popular but strenuous trail that descends into the canyon. South Kaibab Trail: A steep and challenging trail with breathtaking views. Rim Trail: An easy, paved trail that follows the rim of the canyon.
Remember to be prepared for the heat and bring plenty of water if you're hiking down into the canyon. It's a rewarding experience, but it can also be dangerous if you're not careful.
Helicopter Tours: A Bird's-Eye View
For a truly unforgettable experience, consider taking a helicopter tour over the Grand Canyon. This offers a unique bird's-eye view of the landscape.
Aerial Views: You'll see the canyon from a completely different perspective. Unique Photo Opportunities: You'll have the chance to capture some truly stunning aerial photos. Convenience: You can see a lot of the canyon in a short amount of time.
Weathering the Storm: Shooting in Different Conditions
Monsoon Season: Capturing the Drama
Monsoon season (July-September) can bring dramatic thunderstorms and flash floods to the Grand Canyon. While this can be dangerous, it also provides some incredible photo opportunities.
Dramatic Skies: Thunderstorms create dramatic skies with dark clouds and lightning. Dynamic Landscapes: Rain can transform the landscape, creating waterfalls and reflecting pools. Unique Atmosphere: The air is often clear and crisp after a storm, creating a unique atmosphere.
Be careful when shooting during monsoon season. Stay away from exposed areas and be aware of the risk of flash floods.
Winter Wonderland: Snow-Covered Grandeur
The Grand Canyon covered in snow is a truly magical sight. While it doesn't snow often, when it does, it transforms the landscape into a winter wonderland.
Unique Scenery: The snow contrasts beautifully with the red rocks of the canyon. Quiet Atmosphere: The crowds are often smaller in winter. Challenges: Be prepared for cold temperatures and icy conditions.
Dealing with Dust and Wind
The Grand Canyon can be a dusty and windy place. Here are a few tips for protecting your gear:
Use a Lens Hood: This helps to protect your lens from dust and debris. Carry a Lens Cleaning Cloth: Keep your lens clean to avoid scratches. Use a Camera Bag: Protect your camera from dust and wind when you're not using it.
Post-Processing Power: Enhancing Your Grand Canyon Photos
Shooting in RAW
Shooting in RAW format gives you more flexibility to adjust the exposure, colors, and white balance in post-processing.
More Information: RAW files contain more data than JPEGs. Greater Flexibility: You have more control over the editing process. Non-Destructive Editing: You can always revert back to the original file.
Basic Adjustments
Here are a few basic adjustments you can make to enhance your Grand Canyon photos:
Exposure: Adjust the overall brightness of the image. Contrast: Increase the contrast to make the colors pop. White Balance: Adjust the white balance to correct color casts. Highlights and Shadows: Adjust the highlights and shadows to reveal more detail.
Advanced Techniques
Here are a few advanced techniques you can use to take your Grand Canyon photos to the next level:
HDR (High Dynamic Range): Combine multiple exposures to create an image with a wider dynamic range. Panorama Stitching: Stitch together multiple images to create a wide-angle panorama. Dodging and Burning: Lighten and darken specific areas of the image to create depth and dimension.
FAQ: Your Grand Canyon Photography Questions Answered
What is the best time of year to photograph the Grand Canyon?
The best time of year depends on your preferences. Spring and fall offer pleasant temperatures and fewer crowds. Summer brings monsoon season, which can provide dramatic photo opportunities. Winter offers a unique snow-covered landscape, but be prepared for cold temperatures. Consider what kind of photography tips for capturing the beauty of the Grand Canyon you are looking to utilize.
What are the best viewpoints for sunrise and sunset?
Mather Point, Yavapai Point, and Hopi Point are popular choices for sunrise and sunset. Desert View Watchtower and Lipan Point also offer stunning views. For a less crowded experience, try exploring some of the less-visited viewpoints.
What lens should I use for photographing the Grand Canyon?
A wide-angle lens (16-35mm) is essential for capturing the vastness of the canyon. A standard zoom lens (24-70mm) is a versatile option for a variety of shots. A telephoto lens (70-200mm or longer) is great for isolating distant features and compressing the perspective. Consider what kind of photography tips for capturing the beauty of the Grand Canyon you plan to put to use.
Do I need a permit to photograph the Grand Canyon?
You do not need a permit for personal photography. However, commercial photography requires a permit. Check the National Park Service website for more information.
What are some tips for photographing wildlife at the Grand Canyon?
Be patient and respectful of wildlife. Use a telephoto lens to capture close-up shots without disturbing the animals. Avoid feeding wildlife.
How can I protect my gear from dust and wind?
Use a lens hood, carry a lens cleaning cloth, and use a camera bag to protect your camera from dust and wind.
Is it safe to hike down into the Grand Canyon?
Hiking down into the Grand Canyon can be dangerous if you're not prepared. Be sure to bring plenty of water, wear appropriate clothing, and be aware of the heat. Choose a trail that is appropriate for your fitness level.
Conclusion: Capturing Your Own Grand Canyon Masterpiece
Photographing the Grand Canyon is an incredible experience. By understanding the light, mastering composition, and exploring different viewpoints, you can capture stunning images that truly convey the beauty and grandeur of this natural wonder. Remember to be patient, persistent, and to embrace the challenges that come with landscape photography.
The photography tips for capturing the beauty of the Grand Canyon shared here are a starting point. Experiment, find your own style, and don't be afraid to break the rules. The most important thing is to have fun and enjoy the process. So grab your camera, head to the Grand Canyon, and start capturing your own masterpiece! I hope these photography tips for capturing the beauty of the Grand Canyon will come in handy on your journey.
Ultimately, the goal is to create images that resonate with you and capture the essence of this magnificent place. So go out there, explore, and let your creativity shine!
